How To Hide Files Behind The Images
- See more at: http://www.coolhackingtrick.com/2013/03/learn-to-hide-files-behind-images.html#sthash.z3hurfAo.dpuf
There are some important files or document you want to hide from others on your computer. To do that you might be creating folder inside folder to hide such files but in todays tutorial i will change this by teaching you a interesting trick to hide files behind images.To hide a file behind a image means that if any one opens that image he will see the image, but to see the hidden file we need to open that image in a specific way. So lets get started.
How To Hide File Behind Image ?
In order to do this you should have basic understanding of command line, but if you don't know check out tutorial given below. 1. Select an image to be used for hiding file behind the image.
2. Now select a file to hide behind the image and make it in .RAR format. With the help of the WinRAR.
3. And most important is that paste both the files on desktop. You may do this anywhere instead of desktop if you have some basic understanding of command line.
4. Now open cmd by going to Start > Accessories > Command Prompt and type following commands in it.
cd desktop

5. CD stands for change directory by typing above command you change your directory to desktop. After that type command given below.
Copy /b imagename.jpg + filename.rar finalimage.j
There are some important files or document you want to hide from others on your computer. To do that you might be creating folder inside folder to hide such files but in todays tutorial i will change this by teaching you a interesting trick to hide files behind images.To hide a file behind a image means that if any one opens that image he will see the image, but to see the hidden file we need to open that image in a specific way. So lets get started
If you’re looking to hide files on your PC hard drive, you may have read about ways to encrypt folders or change the attributes on a file so that they cannot be accessed by prying eyes. However, a lot of times hiding files or folders in that way requires that you install some sort of software on your computer, which could then be spotted by someone else.
Using a simple trick in Windows, you can actually hide a file inside of the JPG picture file!
You can actually hide any type of file inside of an image file, including txt, exe, mp3, avi, or whatever else. Not only that, you can actually store many files inside of single JPG file, not just one! This can come in very handy if you need to hide files and don’t want to bother with encryption and all that other technical stuff.
Hide File in Picture
In order to accomplish this task, you will need to have either WinZip or WinRAR installed on your computer. You can download either of these two off the Internet and use them without having to pay anything. Here are the steps for creating your hidden stash:
- Create a folder on your hard drive, i.e. C:\Test and put in all of the files that you want to hide into that folder. Also, place the image that you will be using to hide the files in.

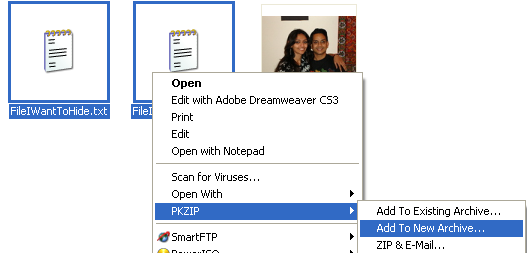
- Now select all of the files that you want to hide, right-click on them, and choose the option to add them to a compressed ZIP or RAR file. Only select the files you want to hide, not the picture. Name it whatever you want, i,e. “Hidden.rar”.

- Now you should have a folder that looks something like this with files, a JPG image, and a compressed archive:

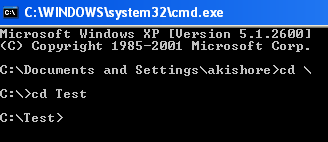
- Now here’s the fun part! Click on Start, and then click on Run. Type in “CMD” without the quotes and press Enter. You should now see the command prompt window open. Type in “CD \” to get to the root directory. Then type CD and the directory name that you created, i.e. “CD Test“.

- Now type in the following line: “copy /b DSC06578.JPG + Hidden.rar DSC06578.jpg” and press Enter. Do not use the quotes. You should get a response like below:

Just make sure that you check the file extension on the compressed file, whether it is .ZIP or .RAR as you have to type out the entire file name with extension in the command. I have heard that some people say that they have had problems doing this with a .ZIP extension, so if that doesn’t work, make sure to compress to a .RAR file.
And that’s it! The picture file will have been updated with the compressed archive inside! You can actually check the file size of the picture and see that it has increased by the same amount as the size of the archive.
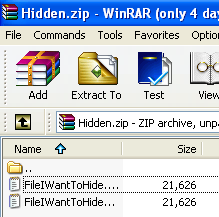
You can access your hidden file in two ways. Firstly, simply change the extension to .RAR and open the file using WinRAR. Secondly, you can just right-click on the JPG image and choose Open With and then scroll down to WinRAR. Either way, you’ll see your hidden files show up that you can then extract out.

That’s it! That is all it takes to hide files inside JPG picture files! It’s a great way simply because not many people know it’s possible and no one even thinks about a picture as having to the ability to “hide” files.
Enjoy!


No comments: