This tutorial explains in a detailed 26 easy step-by-step procedure on how to install Android 4.3 on PC using VirtualBox.This tutorial is created by me. I have really worked hard on this post as I do in every other post so I have one request. Please show your appreciation by not stealing this post and do not copying it as is without giving me the credit for it. I would really appreciate it. Thank You!Download:
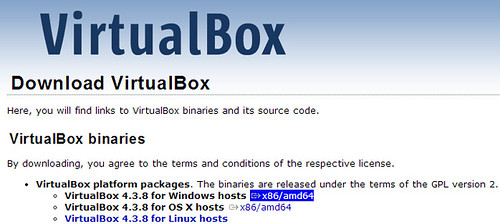
- Oracle VM VirtualBox Download the latest version of VirtualBox from https://www.virtualbox.org/wiki/Downloads
- Android x86 4.3 Image Download the Android 4.3 image from http://android-x86.googlecode.com/files/android-x86-4.3-20130725.iso
- Alternative link to Android image http://www.4shared.com/file/-13fwx4Tce/android-x86-43-20130725.html
- Another alternative link to Android imagehttps://mega.co.nz/#!bQUUAZZS!KjeYWaVxLF8kL4duc0aU7boyzPecz1EKSgWNys35ycg
- Install VirtualBox latest version from the link given above and open VirtualBox.
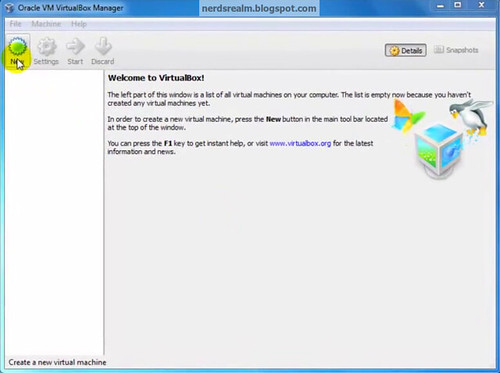
Step 1: Open VirtualBox and select New.
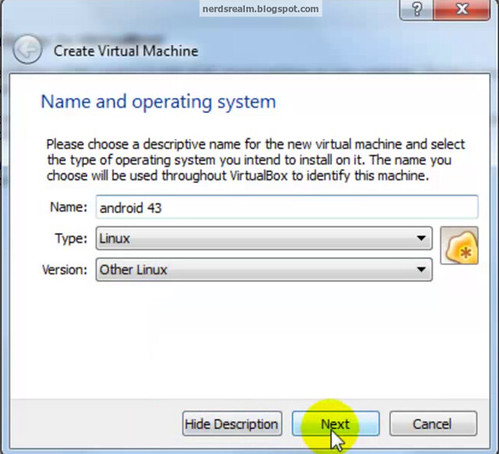
Step 2: In the dialogue box enter the name as you wish and Select type as Linux and version as other and click Next.
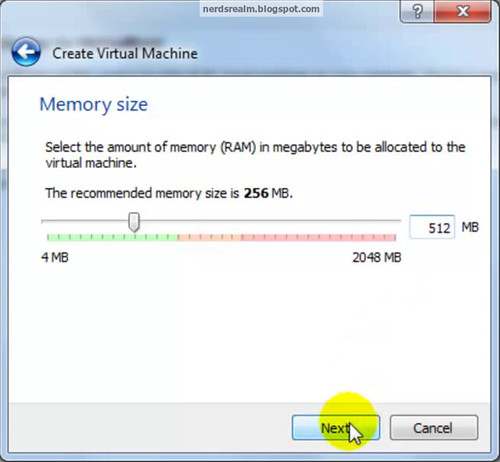
Step 3: Enter the amount of ram you would like to allot for the virtual machine and click Next . Android 4.3 requires at least 1 GB of ram but its not necessary.
Step 4: In the next window select Create a virtual hard disk and click Create.
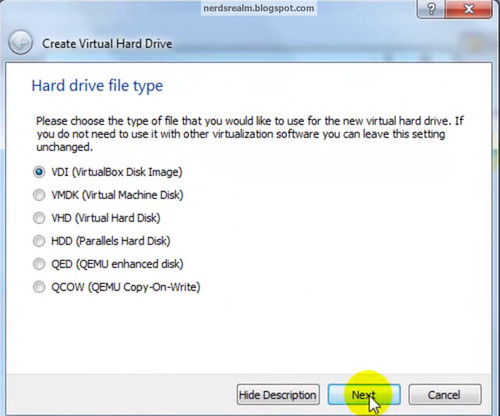
Step 5: Then select VDI and click Next
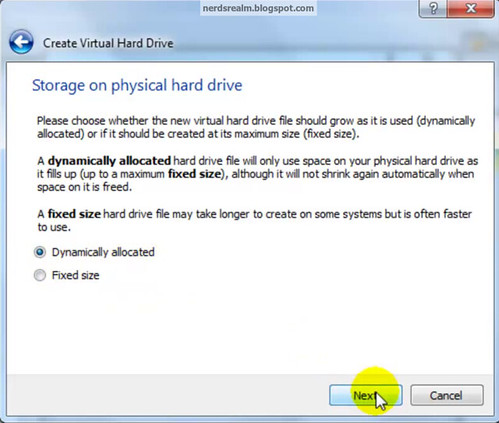
Step 6: In the next window, According to your space requirement you can either select dynamically allocated or fixed size for your storage space . I selected fixed size because I wanted to allocate only 4 GB of storage space to android .
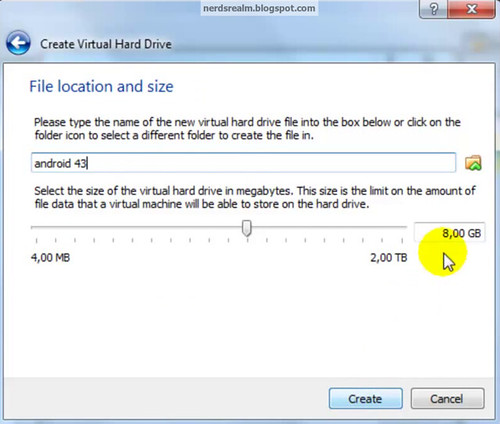
Step 7: Select storage space (Minimum 1 GB required for Jelly Bean)
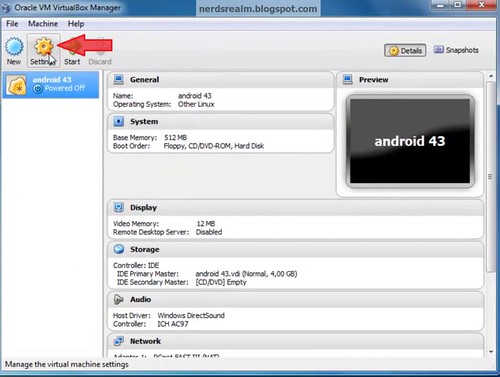
Step 8: Click on the settings button in VirtualBox .
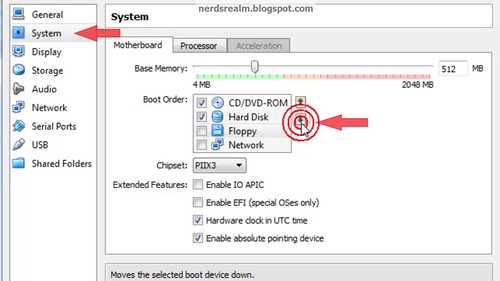
Step 9: Select System and under Motherboard tab select Floppy and untick mark the Floppy option. Using the down arrow key move the Floppy below Hard Disk.
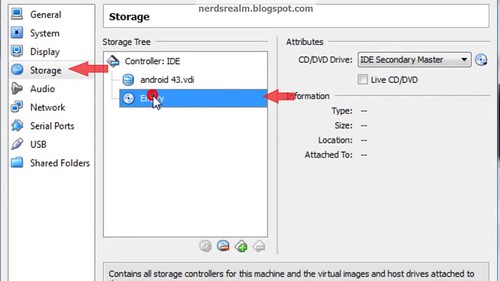
Step 10: Select Storage, below the storage tree select empty.
Step 11: Click on the disk image and select choose a virtual CD/DVD disk file.
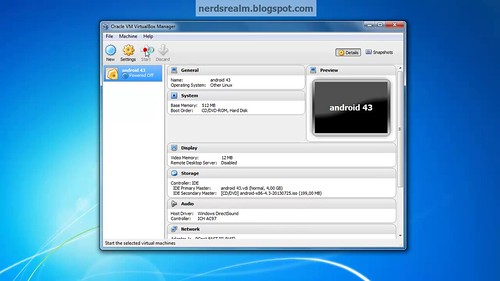
Step 12: Select the android 4.3 .ISO image and click Open. Check the Live CD/DVD box and click Ok .
Step 13: Click Start to start the Setup.
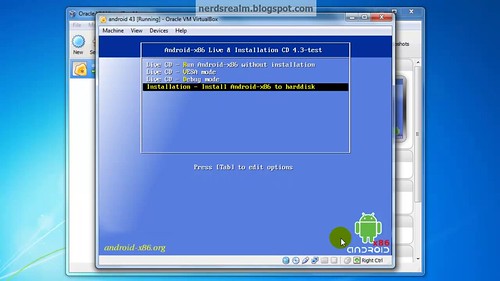
Step 14: In the screen select Install Android-x86 to hard disk.
Step 14: Select Create/Modify Partition.
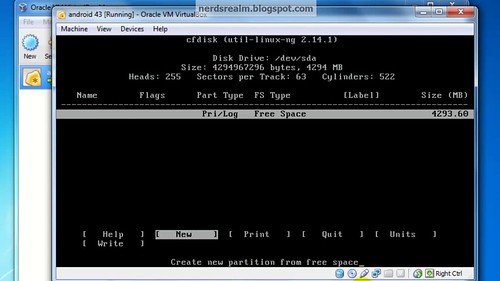
Step 15: Select New using your keyboard arrow keys.
Step 16: Select Primary press Enter.
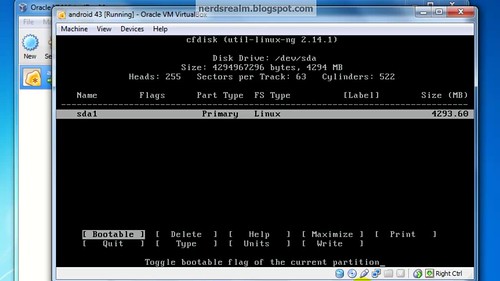
Step 17: Select Bootable and press Enter to make the drive bootable.
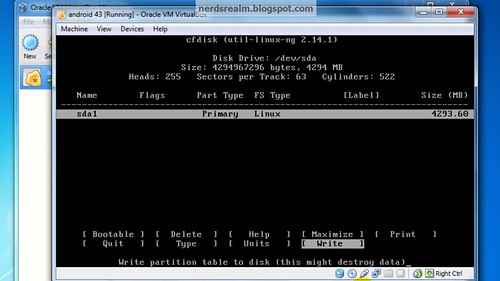
Step 18: Select Write and press Enter
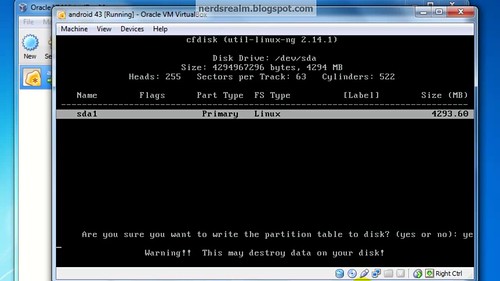
Step 19: Using your keyboard type the word Yes and press Enter.
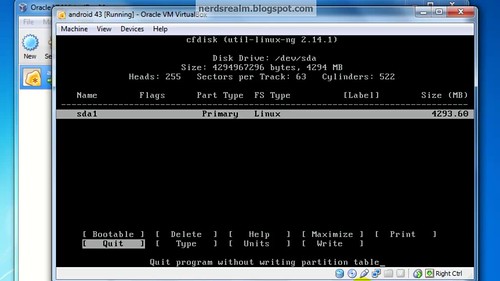
Step 20: Select Quit and press Enter.
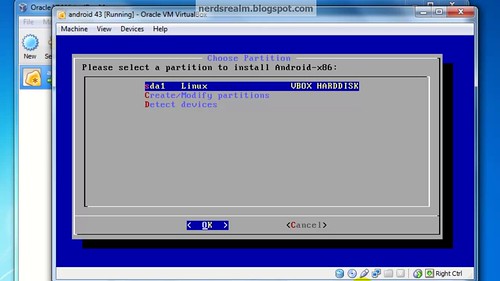
Step 21: Choose sda1 Linux and press OK.
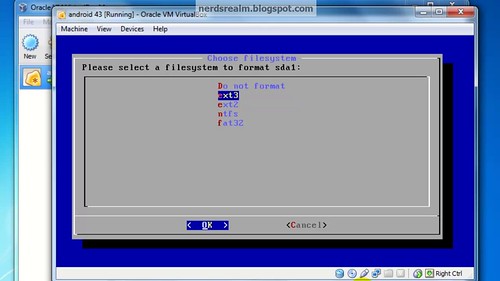
Step 22: Select ext3 and press OK.
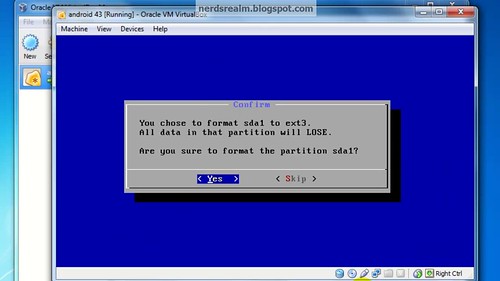
Step 23: Select Yes.
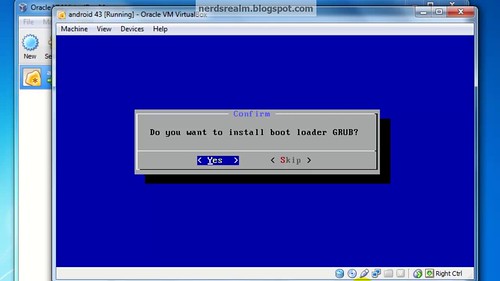
Step 24: When prompted to install grub loader select Yes.
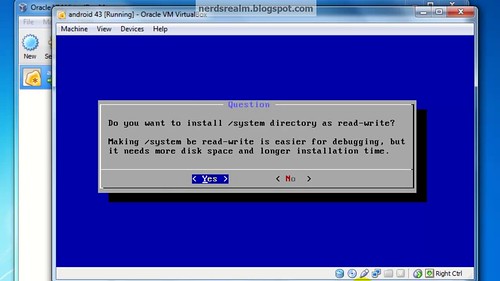
Step 25: Select Yes.
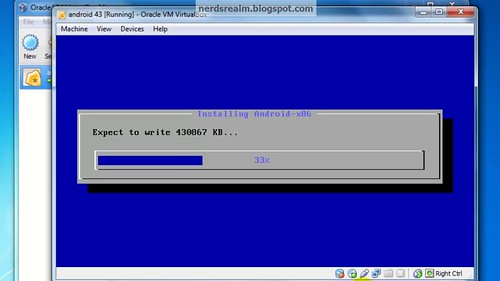
Wait for it...
Step 26: Select Machine option on VirtualBox and click on Disable Mouse Integration while Android loads.
Select your language and follow the screen to set-up your Gmail account to your Android among other things.
Voilà! Now you have successfully installed Android 4.3 on your windows computer

How to Install Android 4.3 Jelly Bean on Windows PC (Full Step by Step Tutorial)
![How to Install Android 4.3 Jelly Bean on Windows PC (Full Step by Step Tutorial)]()
Reviewed by
Anonymous
on
02:38:00
Rating:
5








No comments: